How to Make Pine Pitch Salve
- PhysInc Pilates
- Jul 28, 2019
- 6 min read
Updated: Aug 14, 2019
I know what you're thinking..."What is Pine Pitch Salve and why on earth would you want to make it??"
Pine Pitch Salve is a salve (or balm) made from pine resin (sap). Pine salve has been used for many years as a general first aid: a topical treatment to draw out infection, to draw out splinters and embedded glass. It stimulates blood flow and local immune response and can help decrease inflammation. It's a natural astringent and you can use it on cuts and scrapes. Also, it's an expectorant - you can rub it on your chest to treat coughs. You CAN apply pine resin directly to the body, however it's quite messy and super sticky - making a salve makes it a little easier to work with. Pine salve is also great as a lip balm or what I've been using it for the most is for keeping my feet moisturized. I live in a very dry climate and the skin on my heels becomes dry and cracked very easily. I typically apply some to my feet before I put on my socks and shoes to head out for a hike. It can also help with old injuries or sore, achy muscles by reducing inflammation. I've added some local raw honey and 3 drops of orange essential oil to this recipe. However, you can absolutely tweak this recipe by choosing different essential oils that aid in the anti-inflammation process such as St. John's Wort infused oil, comfrey leaf infused oil, yarrow, chickweed and plantain infused oils. I used orange oil because that's what I already had in the house. I love the citrus smell combined with pine. Just be careful when using oils - you want to use a very small amount so that it's well diluted.
Before you get started, you should know that this is not a quick process! The resin takes a while to soften. This is also a bit of a messy project as pine resin is incredibly sticky (can be used to make glue!). Any tools and materials you use for making salve you will not be able to use again for anything else. I created a designated "resin kit" with tools that I use only for making salve.
Also, in my research I found that there are varied methods to making salve, but none were very specific. Traditionally this is used more in bush craft where you're using open fire and very little modern equipment. Nobody really tells you how long to boil the resin, or how much of this or that. So this is what I came up with after a few trials and I'm happy with this recipe. Once you make it, you'll see how you can easily tweak the ingredients to suit your preference.
*Also note that pine resin is highly flammable and so you'll want to take special precautions in your work area and how you store your resin.
Tools:
3-4 Glass mason Jars (12-16oz). 1 jar for resin collection, 1 jar for boiling, 1 jar for straining, 1 extra jar for "just incases"
1 Wide mouthed, short glass for your finished product (you want to be able to get your hand in there). You can also divide your batch into smaller glass containers if you want something that you can carry on you. A great option are these small cosmetic sized glass jars that come in varied sizes.
1 small sieve
Cheese Cloth
Wooden chopsticks or skewers for stirring
1 pocket knife and gloves (for harvesting your pine resin from the tree)
Double boiler
Ingredients:
1/2 jar full of Pine Resin (See Step 1)
1/2-1 cup Organic White Beeswax Pellets
Coconut Oil (or Olive Oil) - Enough to fill the rest of your jar - about 1/2 - 1 cup depending on what size jar you use.
1/2-1 tsp Local Raw Honey (optional)
1-3 drops infused oil of your choice (optional)
Method:
Step 1: Harvesting your Pine Resin

It is very important not to damage the tree when collecting your resin. Look for areas where the tree already has some damage or where a limb used to be. You will find good sources of sap in these areas. In general, you will find sap towards the bottom of the tree. I have an abundance of Ponderosa Pine where I live and the resin in it's dried form has a yellowish hue. Fresh sap is clear. If it's completely solid it's kind of a dark amber color. Once you find your sap source, use your pocket knife to scrape the resin into one of your mason jars (you may want to wear gloves for this - as I mentioned before this is a sticky job. Hold the jar right up against the tree as you scrape). Collect enough resin to fill half of your jar. Most likely you will be jumping from tree to tree to get the amount that you need.
Harvesting the pine sap is my favorite part of the entire process! Probably because I get to be outdoors, but it's kind of like a nature scavenger hunt.
This is what your harvested pine resin will look like. Chunky bits, white, yellow and amber in color with some bark and other debris:


Step 2: Making the Salve
Prepare your double boiler. If you don't have a double boiler, you can purchase these silicon pads to put at the bottom of your pot. You only need about 1 to 2 inches of water in your pot. Take your mason jar with the pine resin in it and fill the rest of the jar with your oil (Coconut or Olive Oil). With the double boiler on low to medium heat, place the resin jar in the pot and let it heat until the resin is melted. The resin melts slowly and can take up to an hour or more depending on how much resin you are cooking. You'll start to see pieces of bark and debris float to the top. You can pull those out and discard them with a spoon or wait until the end when you strain the mixture through your sieve. Stir your resin/oil every 5 minutes or so. You will notice that a thick dark goo will start to collect at the bottom of your jar.. Just keep stirring that to make sure you get all of the resin. In the end, that goop will be strained out. (You can keep that hard goop in a separate jar and use it later for building a fire if you want. It is highly flammable!) Once all of your resin is melted, it's ready for straining.
Step 3: Strain and add beeswax.
Grab a clean mason jar. Set on top of it your sieve lined with a double layer of cheese cloth. Carefully, (with oven mitts) pour your resin into the sieve to clean out the bark and debris. Once you've strained it, place it back in the double boiler and add your beeswax. I start with 1/2 cup and then add a little more if needed (the amount needed will vary on how large your resin batch is). Here is when you would add honey or essential oil as well. Keep stirring occasionally and once the beeswax has melted (takes a while to melt), you can test the consistency by pouring a small amount of your salve into a cup (I just use a small disposable paper cup) and place it in the freezer. It should solidify within minutes. If you find it's not as thick/solid as you like, go ahead and add more beeswax to your salve. Keep in mind that you are working with oils and so your finished product will be oily.
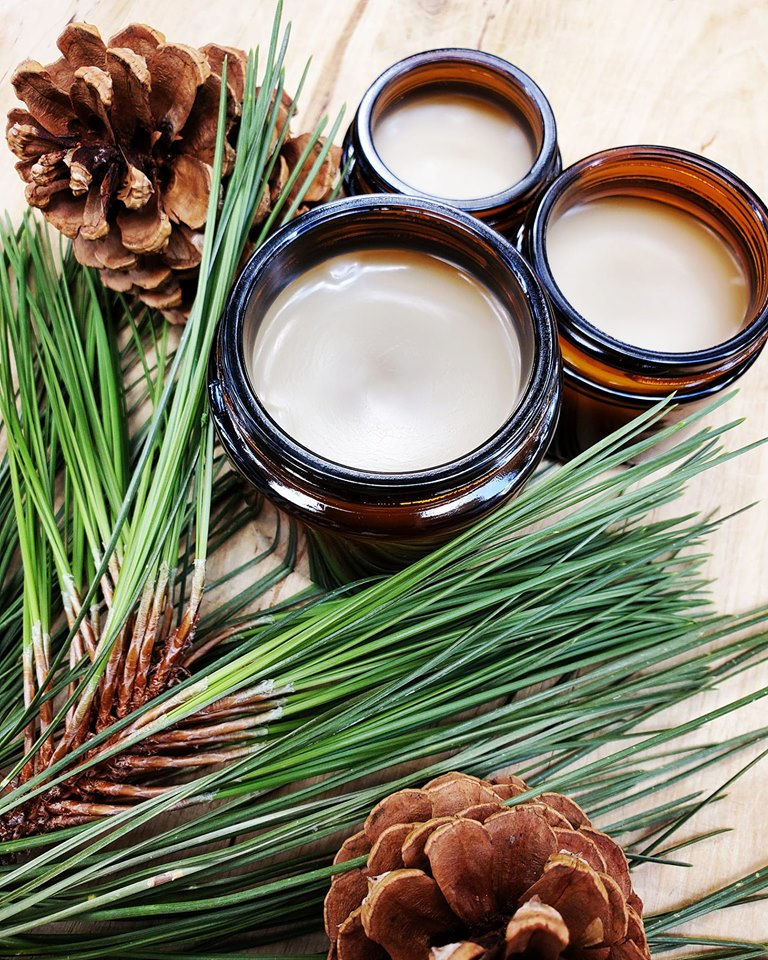
Once you've got your salve how you like it, you can keep it in the jar that you strained it in or pour it into smaller cosmetic jars. Let it cool and store in a cool, dark area. Once it's cooled, it's ready to use!
Tip: You can reheat your finished batch of salve at a later date if needed. For example, if you want to take your large batch and pour it into smaller containers later for travel, or if you make a basic recipe to start with and want to add essential oils later.
**Remember, you don't want to use these jars or tools for anything else but making salve. Either discard the items or keep them separate from your daily cooking tools.


Pictured above: Double boiler with 2 small batches of pine resin mixed with oil, Straining the resin with a small sieve and cheese cloth, Back in the double boiler: Add beeswax, honey and essential oil.


Comments